
Difficulty
Very easy
Steps
11
Time Required
00:30:00
- 0- Getting Started 11 steps

User-Contributed Guide
This guide is not managed by the site's staff.
Quiz
0
-
-
This guide will assist you in constructing your RepBox 2.
-
The pictures in the guide may include options not included in the base kit.
-
Steps that differ for the Sealed Kit version will be indicated in each Stage and step. However, the next step may show the kit as built standard. Again, no cause for alarm.
-
The Repbox is constantly being revised to be easier to assemble, use less parts, and generally be better. We will do our best to update the guide with additional steps that cover any revisions.
-
If anything doesn't make sense, or something is wrong (typos, incorrect pictures, etc) please feel free to comment or contact support via the website. The goal is to make the guide as easy to use as possible. The community is a vital part of making that happen.
-
-
-
The latest design has moved to using a singular steel lid prop on the side of your choosing in lieu of the 3D printed ones pictured. These new props are far more sturdy and reliable. It is normal if you do not see the printed props pictured here in your kit if you have a steel one included with your continuous hinge (Pack G on BOM)
-
If you've opted to print your own parts you may GET 3D PRINT FILES HERE (UPDATED 10/20/19)
-
IF YOU HAVE THE SEAL KIT: The newer latch sets may have a key with a black cover on them. If you have the black cover key and not the silver one be sure you print the version of the Ultra Latch in the files that says "BLACK KEY" on it.
-
-
-
NOTE: PANEL 5 HAS BEEN REPLACED BY A SECOND PANEL 14 IN THE LATEST VERSION TO ALLOW MORE FLEXIBILITY OF CONFIGURATION WITHOUT HAVING TO DISASSEMBLE. ADDITIONAL PLUGS HAVE BEEN PROVIDED TO SEAL ANY UNUSED EXIT HOLES.
-
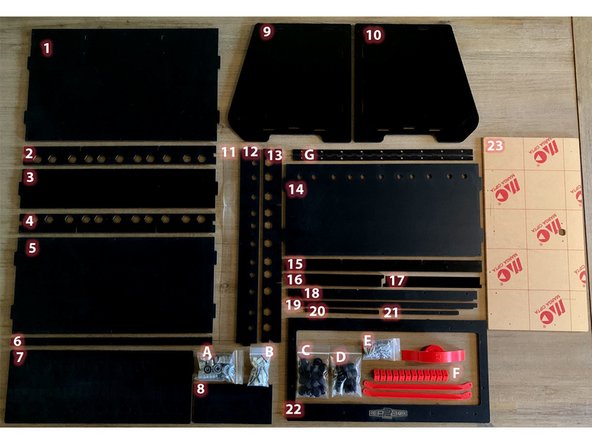
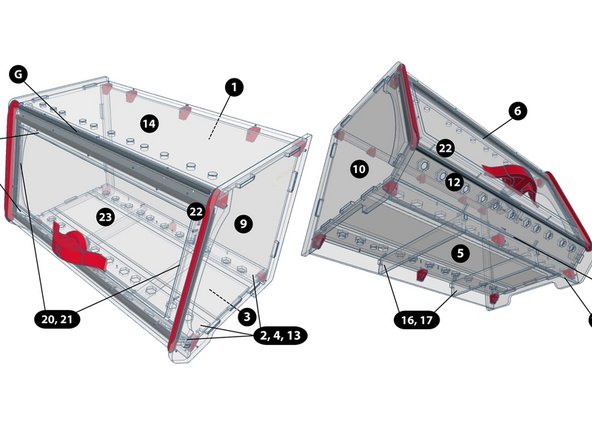
1 - Rear Panel 2, 4, 13 - Exit Panel Interior / Track Guides 3 - Center Track Guide 5 - Top/Bottom Panel (DISCONTINUED FOR TWO PART 14s IN NE VER) 6 - Top Panel Clamp Plate 7,8 - Roller Panels 9 & 10 - Side Panels 11 - Vinyl Front Joint Seal 12 - Exit Panel Exterior
-
14 - Top/Bottom Exit Panels (TWO of these in newest version instead of part 5) 15 - Base Support Bar 16, 17 - Base Stringers 18 - Bottom Lid Seal 19 - Top Lid Seal 20, 21 - L&R Lid Seals 22 - Front Faceplate 23 - Acrylic Lid
-
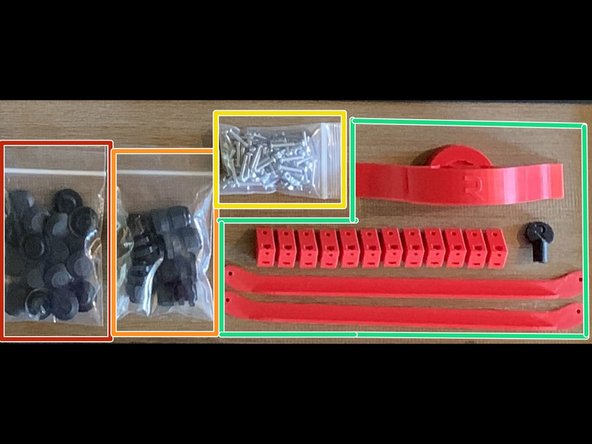
A - Roller Bearings B - Roller Hardware C - Exit Plugs D- Exit Fittings E- Fasteners Bag F - OPTIONAL 3D Printed Parts G - Continuous Hinge & Steel Lid Prop
-
-
-
Exit Fittings Bag
-
Exit Hole Plugs Bag
-
Fasteners Bag
-
3D Printed Parts (Optional)
-
Roller Hardware Bag
-
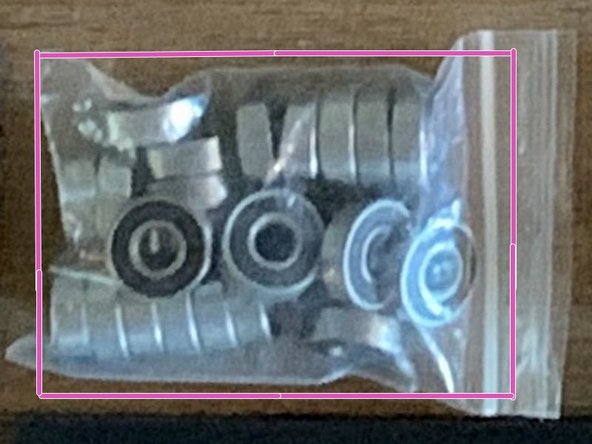
Roller Bearing Bag
-
-
-
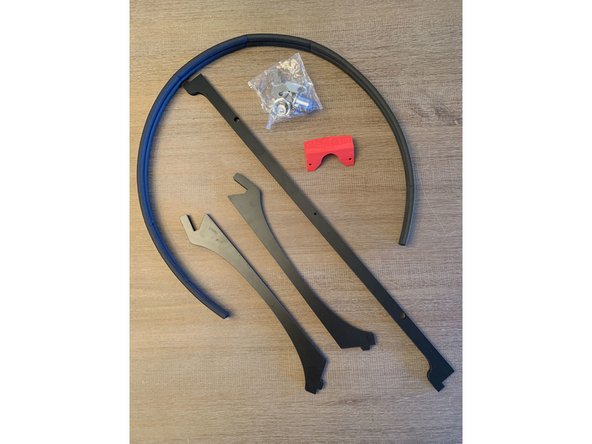
Seal Kit: Gasket, Latch Kit, 3D Printed Latch Plate, Seal Bars
-
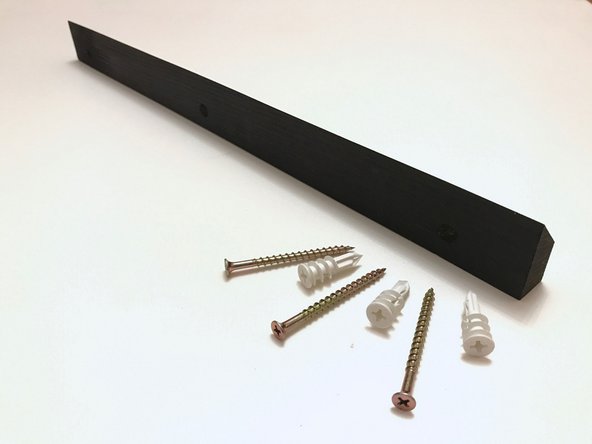
Wall Mount Kit: French Cleat, 3 PCS 2.5" Gold Screws, 3 PCS Nylon Wall Anchors
-
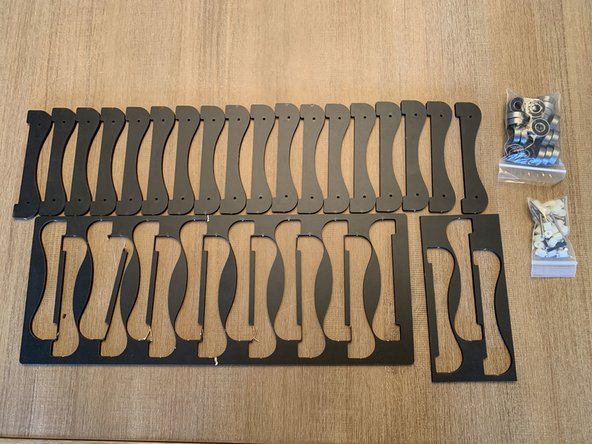
Roller Set: Roller Panels, 608 Bearings Bag, Roller Fasteners Bag
-
-
-
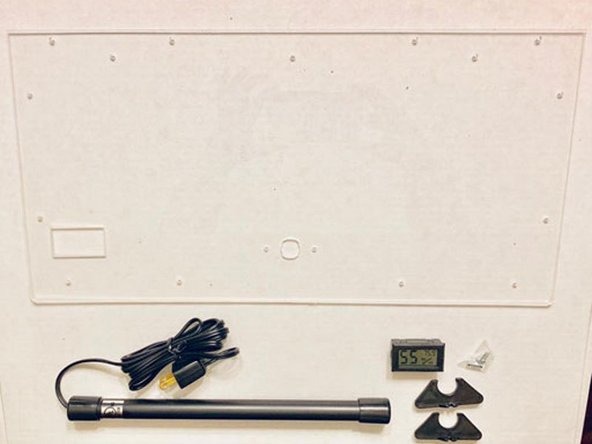
Humidity Hunter Kit: Custom Lid w/Hygrometer Insert, Hygrometer, UL/ETL Listed Dehumidifier Rod, Dehumidifier Rod Mounts
-
-
-
2mm Allen Key is included with the kit.
-
There are a few steps where you'll need to fasten 3mm nylocks. If you don't have a 3mm nut driver or pliers there is a 3D Model of an M3 Nut Holder for you to 3D print with the files included on the website.
-
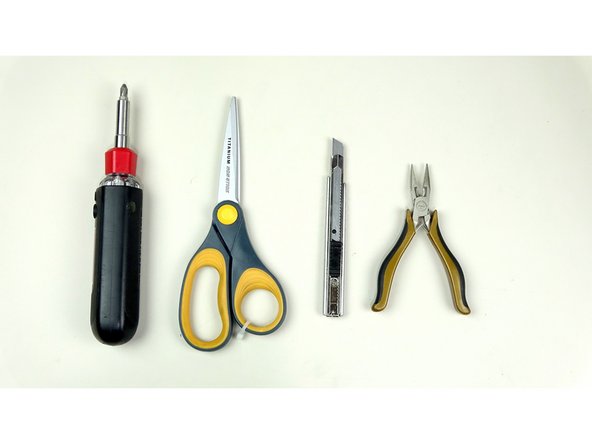
Additional Recommended Tools
-
Needle Nose Pliers
-
Phillips Screwdriver
-
Scisors
-
Hobby Knife
-
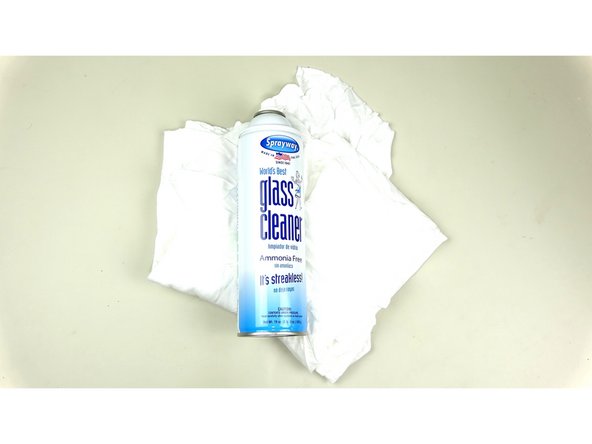
Non-Ammonia Glass Cleaner and Paper Towels
-
-
-
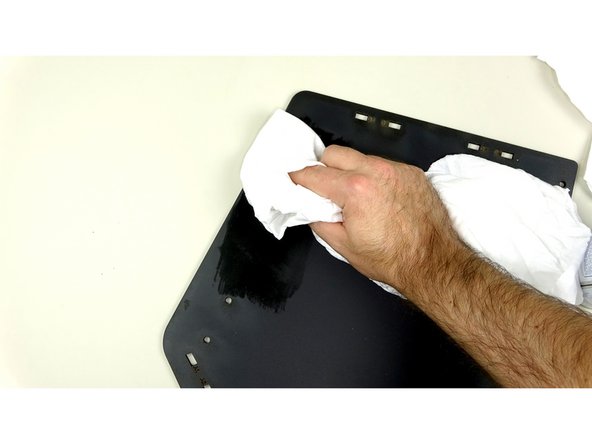
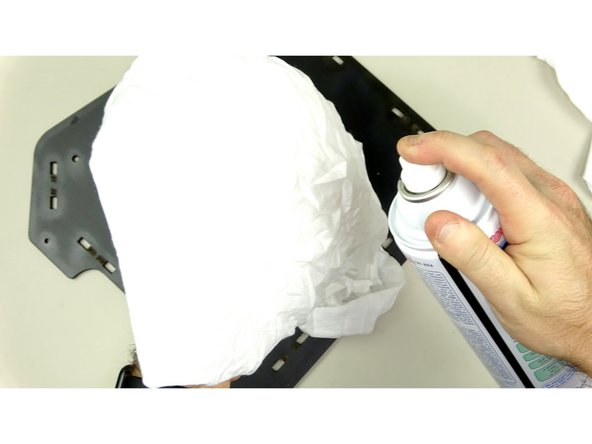
There may be some residue left on the panels from the laser cutting process. This is perfectly normal and it can be easily removed. Use a Non-ammonia based window cleaner or similar product to wipe down before starting.
-
For best results, spray the rag with the cleaner and wipe down the 'glossy' spots until the surface is matte.
-
-
-
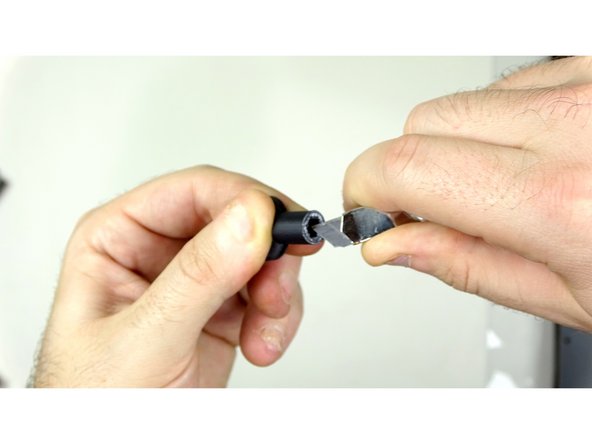
The Optional 3D printed HEX key may have a slight 'elephants' foot around the opening. Check to see if it presses over one of the included M3 Nylocks first. If not you can use the craft knife to carve off the excess filament and open the hole slightly. Its best to do this a bit at a time and then check fitment.
-
This also is true for other 3D Printed Parts in the kit. You may have to use your craft knife/razor to trim off excess filament where the part was on the bed.
-
ALWAYS use caution when trimming excess filament. Practice basic knife safety. Be careful not to cut/stab yourself!
-
-
-
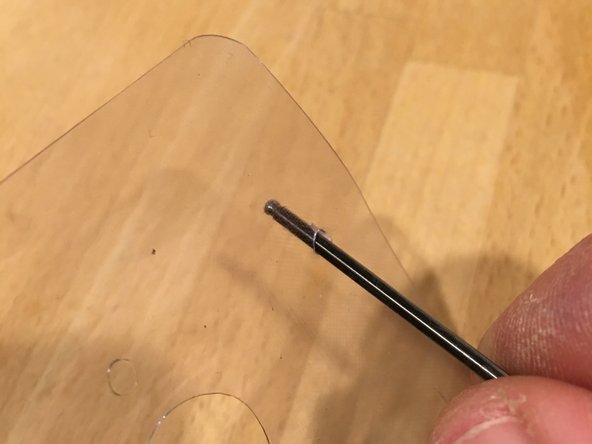
The vinyl seal that comes with your RepBox is pre-scored in the locations that fasteners need to pass through. Prior to assembly you'll want to remove the hole cuts so as to make assembly easier.
-
Take care removing the punch outs. DO NOT USE A SHARP EDGE FOR THIS Accidentally cutting or scoring in the wrong location can make it easier for the vinyl to tear. For best results press lightly on the score with a blunt object like the hex key to get it started. Once through the cut you can use your fingers to slowly pull the rest out.
-
Its a good idea to make sure all the small hole punches are completely torn away before assembly to allow for complete sealing and avoid binding the screws up on assembly.
-


Cancel: I did not complete this guide.
6 other people completed this guide.
