
-
-
Base assembly
-
Top panel assembly
-
Side panels (photo may differ if you have the seal kit vs standard)
-
-
-
Place one of the sidepanels on your work surface and slowly press the base assembly tabs into the corresponding slots.
-
The finished side of the MDF sidepanel goes on the inside of the box. The side panel slot positioning is slightly different on each side so you'll know if you're trying to put it together the wrong way since it won't fit.
-
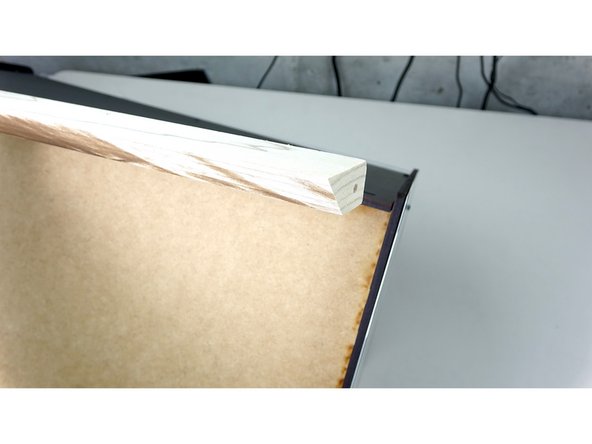
Add the center guide track. Its reversible so you can set the 5 spool or 9 spool guidelines forward based on your preference.
-
Place the top panel into the side panel by slightly tipping the rear panel out of its tabs and meshing the top and rear tabs together as you seat both back into the side panel. The unfinished side of the top panel should be on the inside of the box.
-
-
-
Place the remaining side panel assembly on top, carefully pressing in all the tabs into the slots as you go.
-
The center track guide has a tendency to fall forward as you release it so hold it in place with one hand while you press the side panel onto the top side.
-
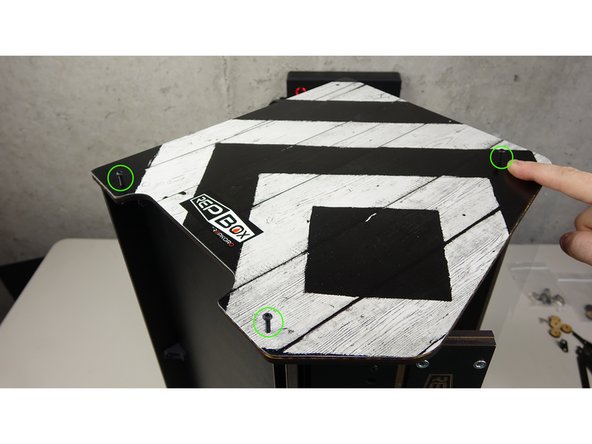
Starting with the holes at the bottom of the side panel fasten to the universal brackets with 16mm bolts.
-
Make sure the square nuts haven't shifted out of place in your universal brackets so that the bolts seat and fasten properly
-
STANDARD KIT: For the top corner at the front of the box you will fasten universal bracket already attached to the side panel from the earlier step to the top panel using a 16mm bolt.
-
SEAL KIT: Line up the top panel assembly with the hole in the top of the seal bar and bolt with a 16mm bolt.
-
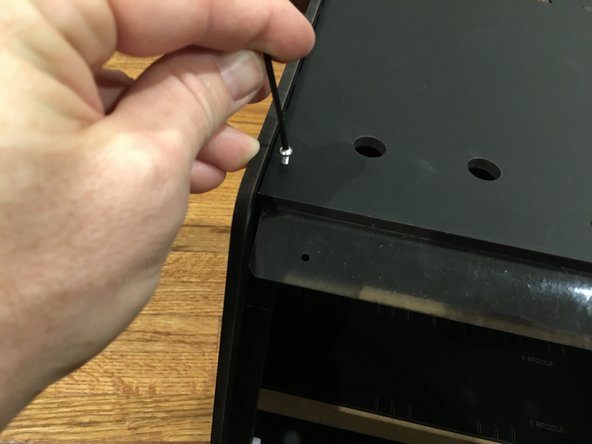
If you're having trouble lining up the top panel to bolt to the side panel start by pushing your allen wrench through the hole and making sure the holes of the nylon hinge, hinge clamp and the square nut you're bolting to are all lined up properly.
-
-
-
This process will differ slightly depending on whether or not you have the desktop kit or the optional wall mount kit.
-
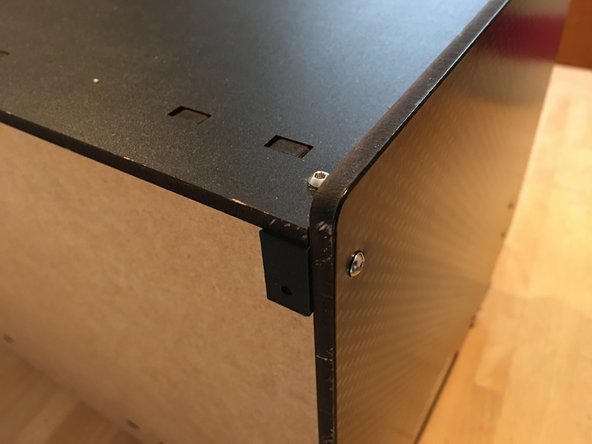
DESKTOP KIT: Press square nuts into one end and the center holes of your remaining universal brackets. Fasten these brackets to the rear corners of the top plate and the top rear corner of the side panels using 16mm bolts. The flat edge of the U Bracket should be facing AWAY from the back of the box as is in the picture.
-
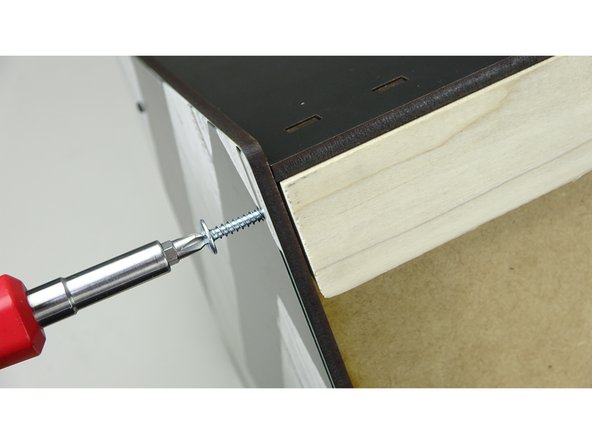
WALL MOUNT KIT: Using the cleat that has holes pre-drilled into the ends, line up the cleat to the back of the box and fasten with the 1" Truss Head Screws (the longer of the screws) with a Phillips screwdriver. Fasten the top panel to the wood cleat using the 3/4" Truss Head screw.
-
Though not required, for extra stability in a wall mount configuration you may want to drill a hole in the pre-marked location on the inside top of the rear panel and use the additional 3/4" Truss Head Screw to fasten the rear panel to the cleat.
-


Cancel: I did not complete this guide.
2 other people completed this guide.
