
-
-
If you received your kit after 11/20/2018 you have the new 1.5 kit, please follow that guide instead as the process has changed slightly.
-
This guide will assist you in constructing your Repbox. Both the Standard Kit and the Sealed Kit Version.
-
The pictures in the guide are mainly from the standard kit assembly. If you have the sealed kit version, you will notice that some pieces in the pics of various steps are different from what you see during your build. This is ok.
-
Steps that differ for the Sealed Kit version will be indicated in each Stage and step. However, the next step may show the kit as built standard. Again, no cause for alarm.
-
The Repbox is constantly being revised to be easier to assemble, use less parts, and generally be better. We will do our best to update the guide with additional steps that cover any revisions.
-
If anything doesn't make sense, or something is wrong (typos, incorrect pictures, etc) please feel free to comment. The goal is to make the guide as easy to use as possible. The community is a vital part of making that happen.
-
-
-
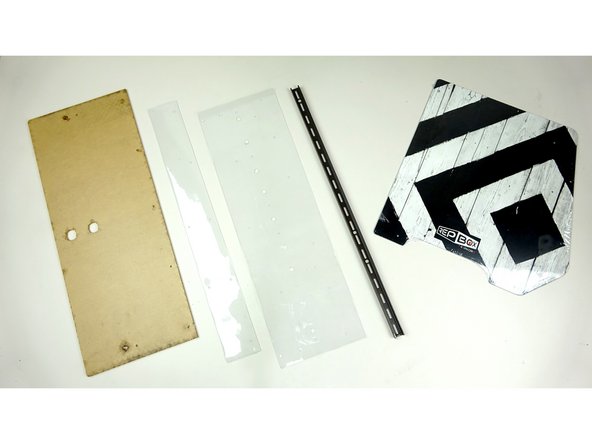
SMALL PANELS
-
1-Acrylic Lid Clamp, 2-Top Lid Plate Clamp, 3-Outer Face Plate, 4-Inner Face Plate (This is a larger piece on the seal kit version), 5-Inner Exit Plate, 6-Outer Exit Plate, 7-Rear Track Guide, 8-Front Track Guide, 9-Center Track Guide
-
LARGE PANELS
-
1-Rear Panel, 2-Top Panel, 3-Base Panel
-
OTHER WOOD PARTS
-
Side Panels, Wall Mount Planks, Roller Panels
-
-
-
LARGE PIECES
-
Acrylic Lid, Small Vinyl Hinge, Large Vinyl Hinge, Steel Base Support Beam, Graphic Side Panels
-
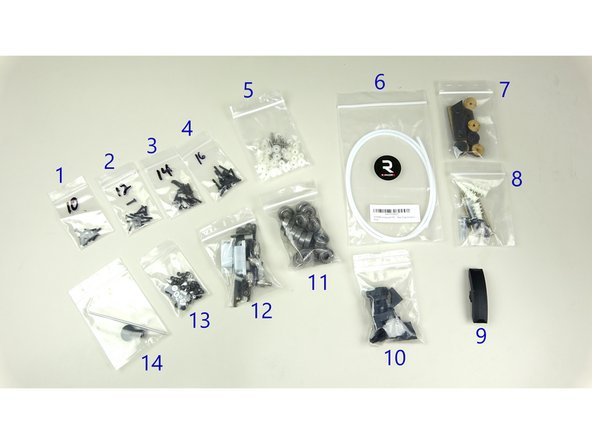
STANDARD KIT HARDWARE BAGS (2nd Pic)
-
1-10mm Bolts, 2-12mm Bolts, 3-14mm Bolts, 4-16mm Bolts, 5-Roller Parts, 6-PTFE Tube, 7-Wood Standoffs, 8-Wall Mount Hardware, 9-Lid Handle, 10-Bracket Bag, 11-Rollers, 12-Lid & Faceplate Parts, 13-Fasteners, 14-Tools
-
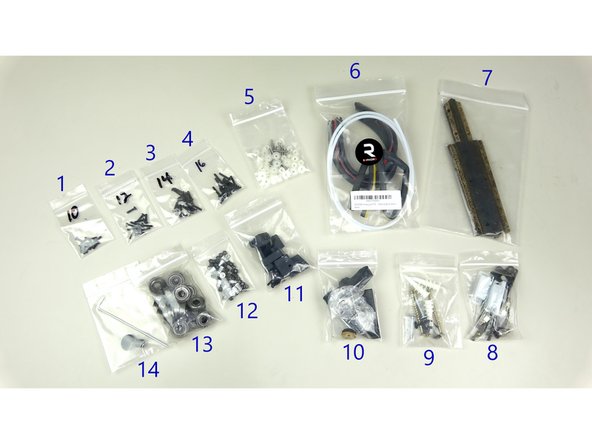
SEAL KIT VERSION HARDWARE BAGS (3 Pic)
-
1-10mm Bolts, 2-12mm Bolts, 3-14mm Bolts, 4-16mm Bolts, 5-Roller Parts, 6-PTFE Tube and Seal strips, 7-Seal Kit Seal Bars, 8-Lid & Faceplate Parts, 9-Wall Mount Hardware, 10-Lock and handle, 11-Brackets, 12-Fasteners, 13-Rollers, 14-Tools
-
-
-
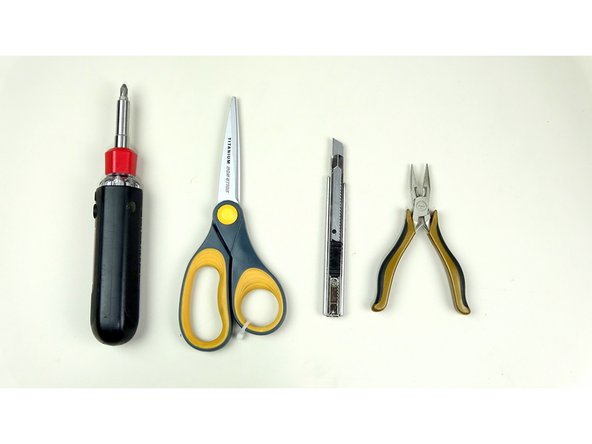
You will need some additional tools that are not provided
-
Phillips Head Screw Driver
-
Scissors
-
Craft Knife/Exacto/Razor
-
Pliers
-
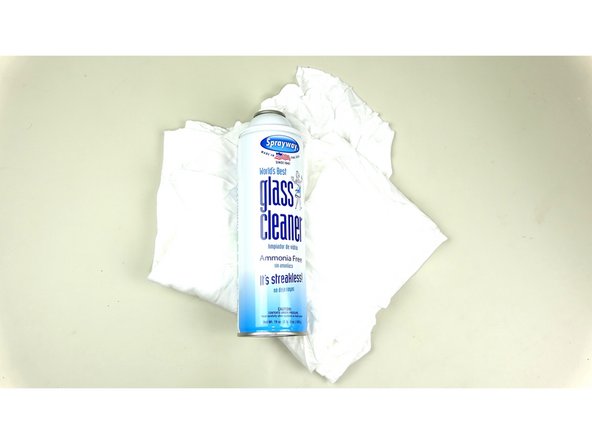
Glass Cleaner (Non-Ammonia if available)
-
Old Rags (Cloth. Paper towels can scratch the finish)
-
-
-
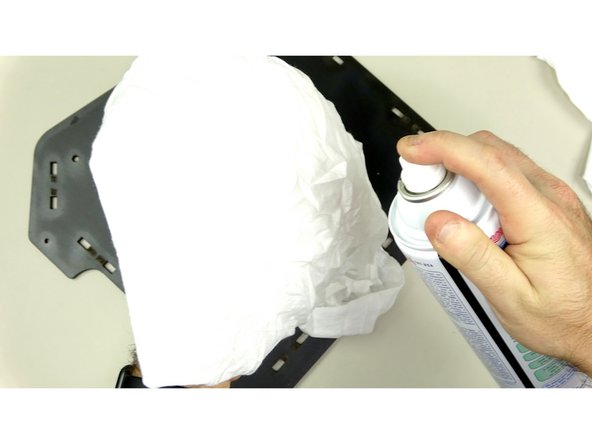
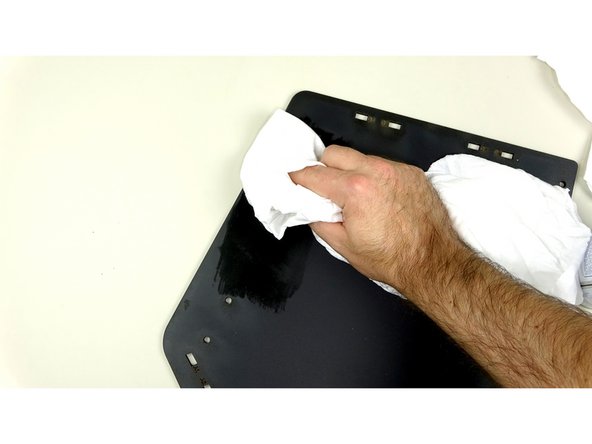
There may be some residue left on the panels from the laser cutting process. This is perfectly normal and it can be easily removed. Use a Non-ammonia based window cleaner or similar product to wipe down before starting.
-
For best results, spray the rag with the cleaner and wipe down the 'glossy' spots until the surface is matte.
-
-
-
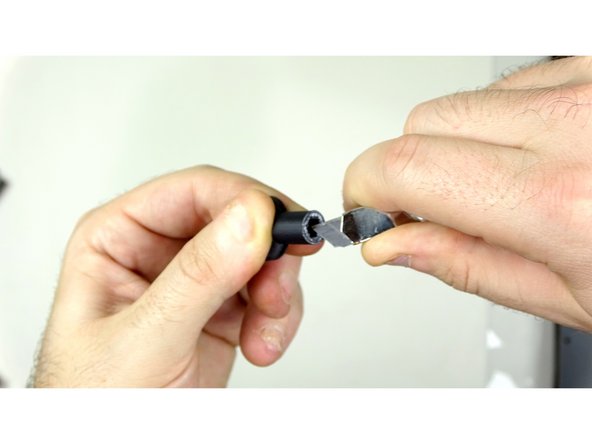
The Included 3D printed HEX key may have a slight 'elephants' foot around the opening. Check to see if it presses over one of the included M3 Nylocks first. If not you can use the craft knife to carve off the excess filament and open the hole slightly. Its best to do this a bit at a time and then check fitment.
-
This also is true for other 3D Printed Parts in the kit. You may have to use your craft knife/razor to trim off excess filament where the part was on the bed.
-
ALWAYS use caution when trimming excess filament. Practice basic knife safety. Be careful not to cut/stab yourself!
-
-
-
The Newest version of the Seal Kit includes 3D Printed Seal Bars (Complete) and do not require cleaning. If you have these 3D Printed bars, you can skip this step.
-
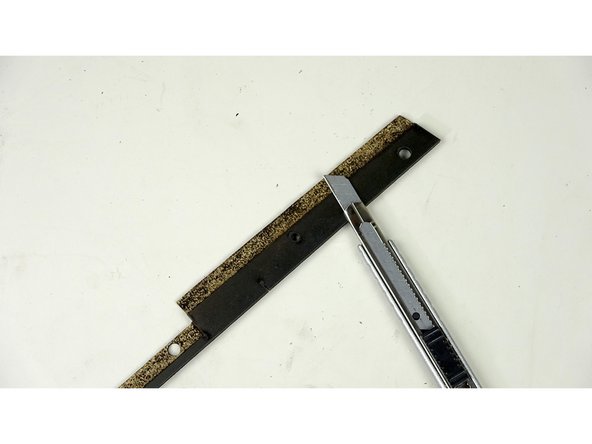
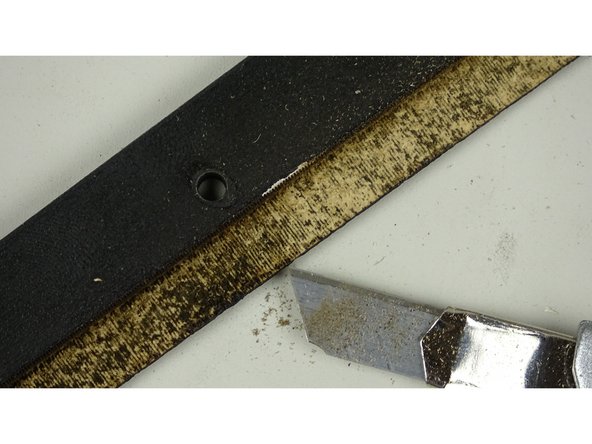
The Laser cut Seal Bars that come with the seal kit need to be cleaned up. There is a small amount of carbon build up that needs to be scrapped off to ensure the seal strips adhere to the wood.
-
Use your craft knife or sandpaper to clean off as much of the carbon build up as you can, without taking chunks out of the wood.
-
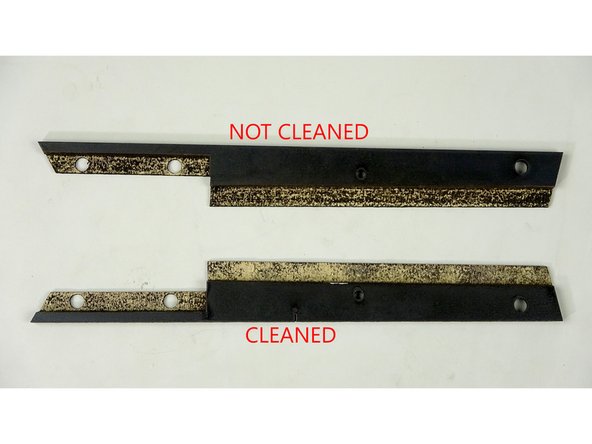
You can see the difference between a cleaned one and a non-cleaned one in the third pic. Doesn't need to be perfect.
-
Set these aside for now.
-


Cancel: I did not complete this guide.
5 other people completed this guide.
