Tools
Parts
No parts specified.
-
-
Version 2.1 Of the RepBox introduces a newer narrow profile roller assembly that allows you to rotate in different directions for positioning your spools closer to the exit holes needed and better fit for larger arrays of narrow spools.
-
Your rollers may be black or white in color. This is perfectly normal and they function exactly the same.
-
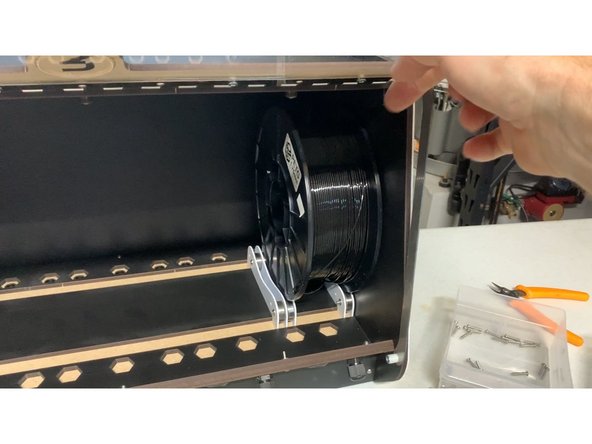
The RepBox uses flanged rollers that slide on a track inside the box to allow for variable width and height spools.
-
Each RepBox comes with enough rollers for six spools:
-
Two "single" rollers for the ends.
-
Five shared "double" rollers for the middle of the group.
-
The following videos illustrate proper assembly of both roller styles.
-
-
-
For each single roller you'll need two of the roller side panels from the (Part 7) Punchout sheet and the roller hardware from Parts Pack B
-
Each group of 6 spools needs two single rollers that go on the outsides of the RepBox.
-
-
-
For each double roller you'll need three of the roller side panels from the (Part 7) Punchout sheet and the roller hardware from Parts Pack B
-
Repeat 5 times. Each set of six rollers requires 5 double rollers.
-
-
-
The rollers are designed to slide in the tracks on the inside of the RepBox so they can accommodate virtually any width of spool.
-
Position them as desired and start loading your filament into your RepBox!
-
-
-
That does it for the standard RepBox build! Way to go! If you have any of the optional kits you can find details on how to install them here:
-
-
-
-
-
Cancel: I did not complete this guide.
6 other people completed this guide.


