-
-
Your wall mount kit should include the following parts as outlined on the BOM
-
Wooden Wall Cleat
-
3pcs- 75lb Nylon Wall Anchors
-
3pcs- 2.5in gold screws
-
The "hooks" for the RepBox side of the cleat are the mega brackets that came with the box. To wall mount you will simply turn them around as shown in pic 3 and will be detailed further in the next step.
-
-
-
Hopefully you read these details in steps 7-8 in the main assembly guide but if somehow you missed it you can easily reconfigure the mega-brackets into "hook" fashion as shown here.
-
Start by pressing the square nuts into the brackets in the locations shown in pic 1.
-
If needed you may easily press the square nuts back out of the bracket by using a hex key and pressing through the release hole on the opposite side of the square hole you press the nut into.
-
Be sure to press square nuts into the vertical slot along the hypotenuse of the bracket for the corner pieces.
-
Repeat this process 5 times and anchor into the back panel as pictured.
-
Verify the wall cleat fits snugly underneath all of the hooks as shown in pic 3.
-
-
-
WARNING: A fully loaded RepBox can weigh upwards of 10kg depending on configuration. No two wall installations are the same, use your best judgement when picking an install location. If you have thin or damaged drywall or brittle plaster consider selecting a safer mounting location.
-
The wall cleat is intentionally designed with the end holes being spaced 16 inches apart on center to coincide with traditional US wood framed building standards. If possible, find a point on your wall where you can span two studs for maximum strength.
-
If you are unable to anchor to any studs don't worry, the 75lb anchors are sufficient for anchoring your fully loaded RepBox to the wall but please use common sense and make sure everything is properly installed checking stability as you add weight.
-
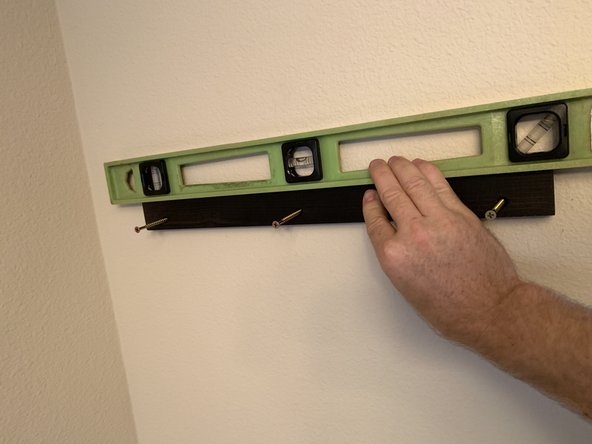
Once you've selected your mounting location use a level and START the gold screws into the wall just enough to mark the holes.
-
Remove the screws and bracket from the wall and use the nylon anchors in the holes that don't align with a stud.
-
Lay the mount back over the start holes and screw into the studs/anchors as appropriate. Be sure to USE ALL 3 MOUNT POINTS for maximum security.
-


