Introduction
RepBox TT v1.1
Preparation guide for building the RepBox TurnTable v1.1
-
-
To build the RepBox TT v1.1, we recommend that you work on a desk or work table surface. Parts may need cleaning (particularly, black edges) and may end up having rough edges, so plan accordingly.
-
Most panel parts can be separated from sheets manually by simply snapping them off, but in some cases you may want to use a hobby knife. Keep paper towels or rags handy for wiping parts down. You may use sandpaper and a marker for cosmetic touch-ups.
-
For other parts such as the 3D-printed Brackets, you may want to have scissors, a flush cutter, or a hobby knife to cut off runners or trim.
-
For assembly, you will need a #2 Phillips-head screwdriver for most steps. You will also need a #1 Phillips-head screwdriver for catch plate assembly. We recommend against using powered screwdrivers or similar.
-
You may optionally use a deburring tool to help sand or file the hole edges in the back panel. This can help when inserting exit plugs.
-
You may want to use something to label the parts and keep track of part orientation. Painter's tape or sticky memo pads work well for this.
-
-
-
Remove packaging and clip any zip ties that secured your panels during shipping.
-
There may be a slight coating of dust left over from the fabrication process. Now is a good time to wipe down the panels with alcohol and a paper towel or rag if needed.
-
-
-
Each panel sheet holds one or more panel parts. You should be able to identify the parts based on the diagram included in the box, or based on pictures shown in later steps of this guide.
-
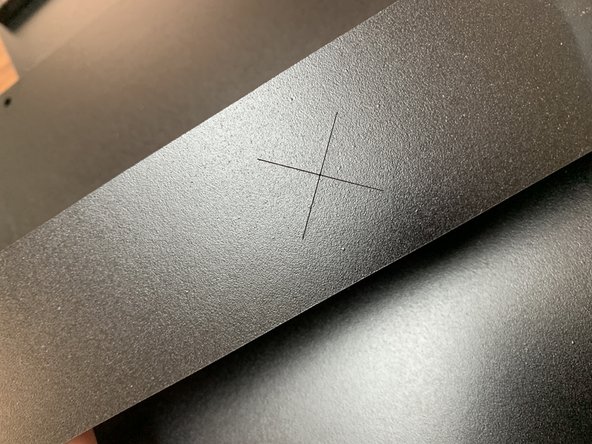
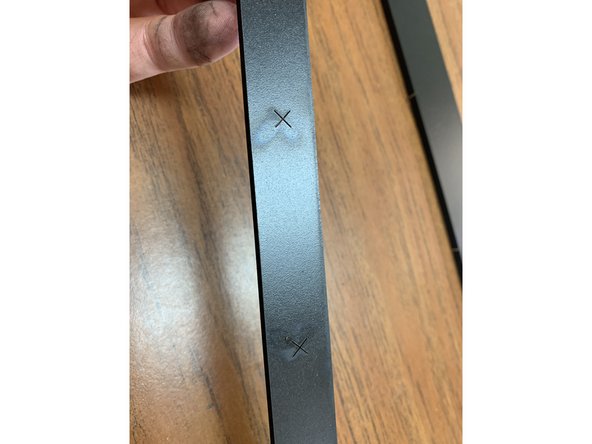
Some excess material is left on the panels to help protect and bundle the panel parts in shipping. Remove any excess material marked with an "X" or tabbed at the edges.
-
Warning: The edges of the panels can sometimes be sharp. Be careful when handling or wear gloves to avoid cuts.
-
-
-
Sacrificial tabs used to protect panel parts or aid in packing should just snap off easily, as shown in the video here.
-
-
-
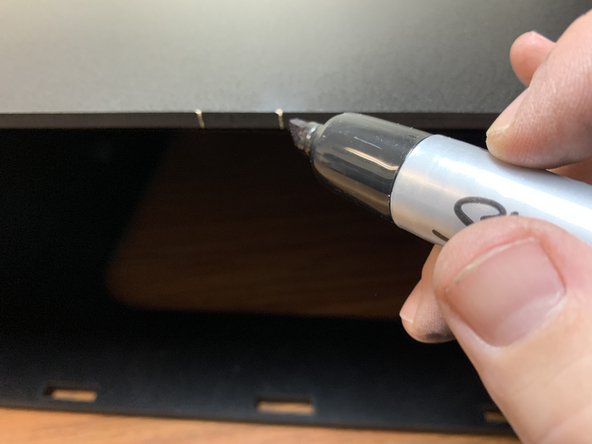
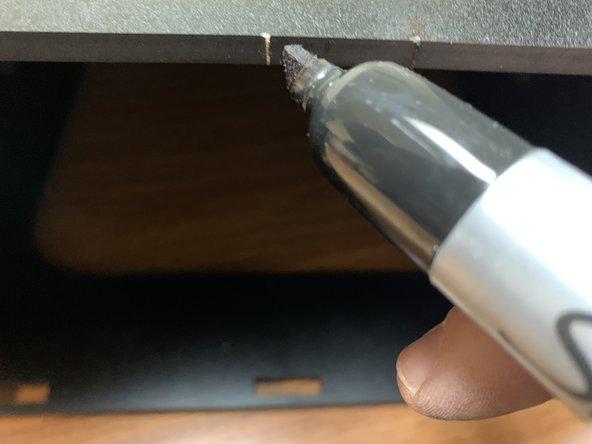
After breaking the panel parts out of the panels, you should wipe down the edges to remove carbon formed in the manufacturing process. Just use a paper towel for this, and go gently to avoid snags where the break-away tabs were.
-
If you are concerned with the appearance of where panel parts were broken away from panel sheets, you can can conceal them with a black marker. (You may also sand them lightly before blackening them.)
-
-
-
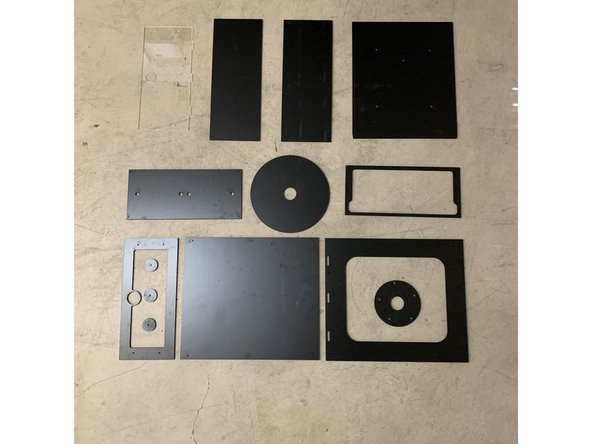
These next pages are provided to help you identify the panel parts and their orientation.
-
For manufacturing reasons, the parts are cut to save space. As such, part numbers shown on each page will not be ordered by part number, but instead by which panel sheet they were in.
-
-
-
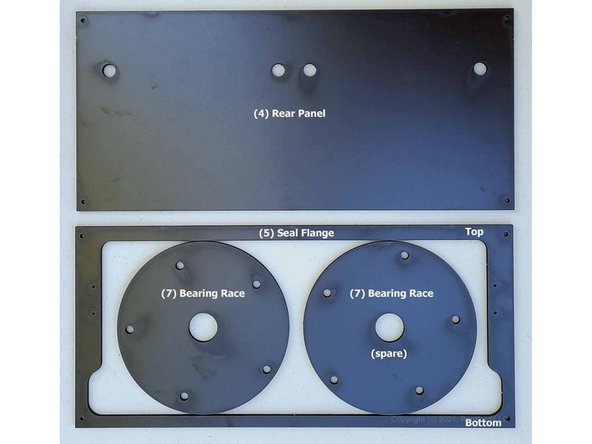
This panel contains the Rear Panel (4), Seal Flange (5), and Bearing race (7). There will be two of part (7) available. One is a spare.
-
You may choose to orient the Rear Panel (4) such that the plug/exit holes are closer to the top or base of the box. Follow specific instructions in the Build Guide.
-
-
-
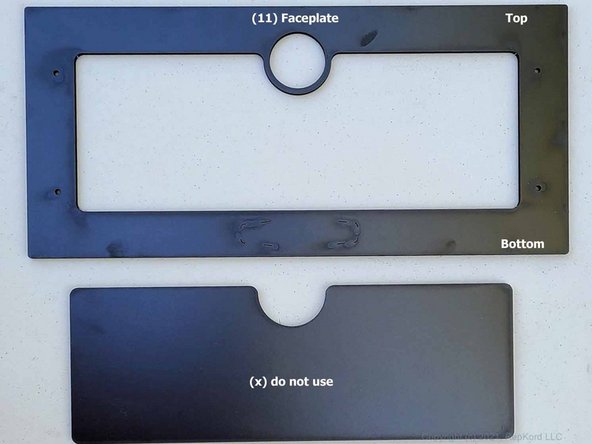
This panel only contains Faceplate (11). The center section that comes from within the Faceplate is not used.
-
-
-
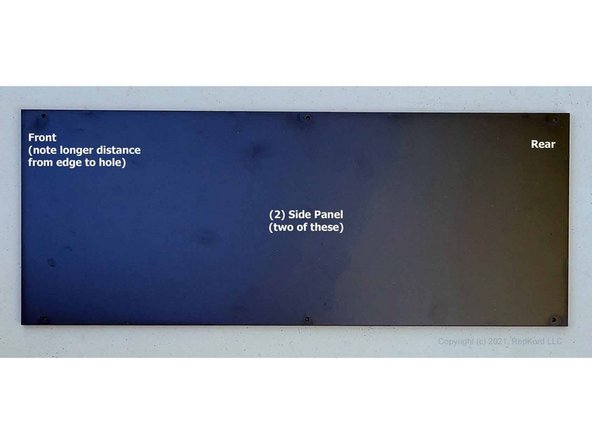
This panel contains a Side Panel (2). You will find another one of these on another sheet.
-
For the Side Panel (2) parts, you can tell which is the front edge, because it has a greater gap between it and the adjacent holes (along top and bottom). By comparison, the back edge-to-hole distance is shorter.
-
-
-
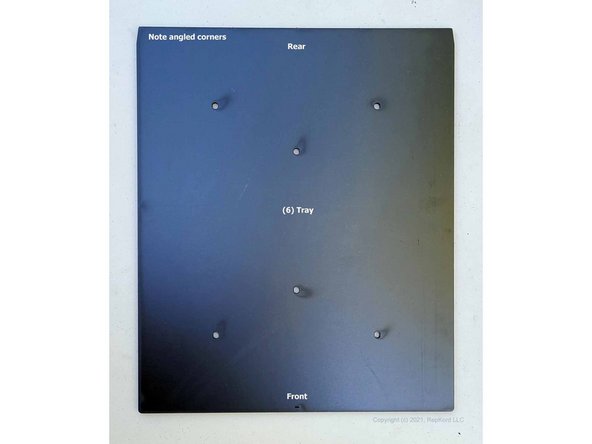
This panel contains only one part, the Tray (6). The left and right edges of this part taper inward at the rear.
-
-
-
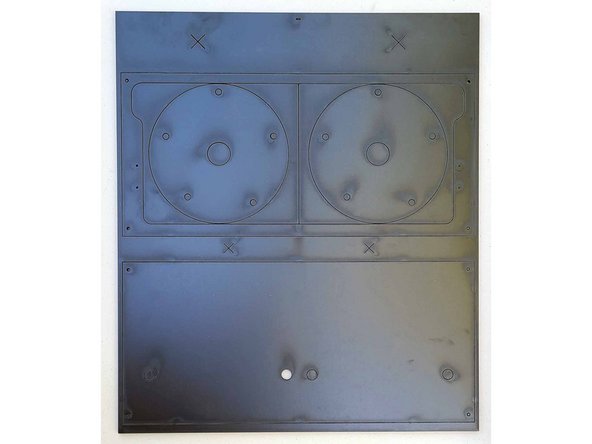
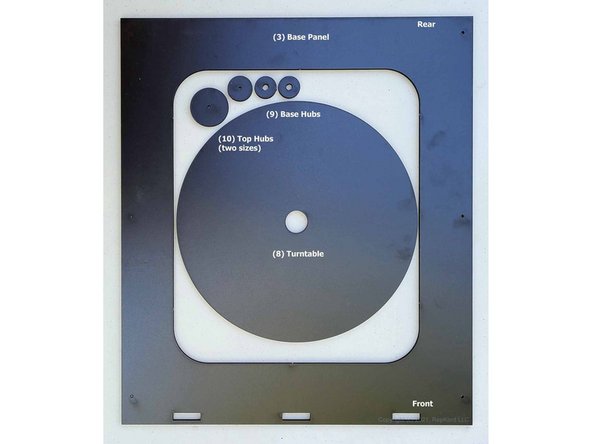
This panel contains the Base Panel (3), Turntable (8), Base Hubs (9), and Top Hubs (10).
-
The Base Panel (3) has three notches along the front edge.
-
The Base Hubs (9) are the smaller circular pieces with larger holes. There are two of these.
-
There are two Top Hubs (10), each of a different diameter. You will use one, depending on the size of your filament spool hub hole. The Top Hub (10) parts have smaller holes at the center, compared to the Base Hub (9) parts.
-
-
-
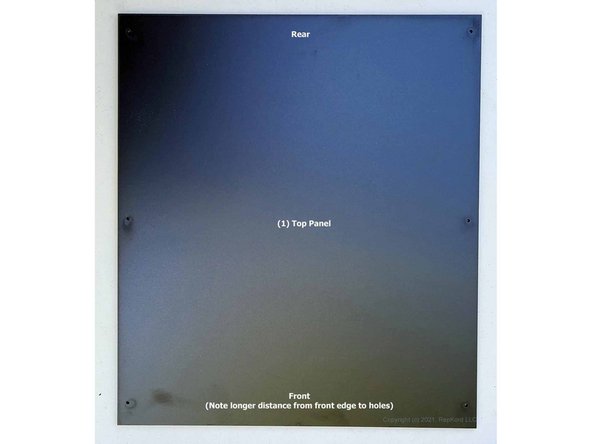
This panel contains the Top Panel (1).
-
You can determine which is the front edge of this part because of the distance between the edge and the adjacent holes (along the left and right edges). By comparison, the distance from the rear edge to adjacent holes is smaller.
-
-
-
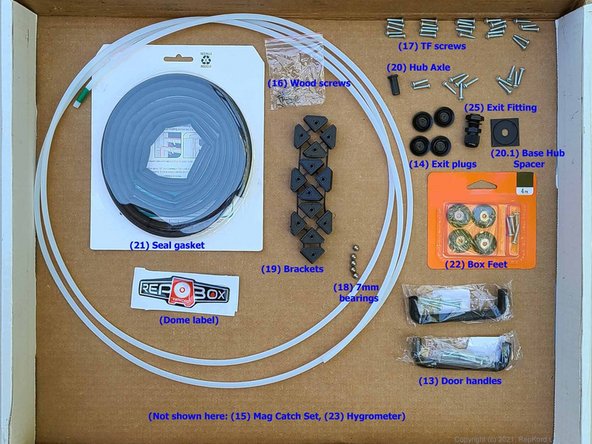
This picture shows most of the hardware parts that come with the RepBox v1.1.
-
The Brackets (19) are shown attached by runners here. You should clip those off using scissors, a flush cutter, or a hobby knife.
-
The Base Hub Spacer (20.1) is a circular part and should be broken out of surrounding styrene if it is still attached.
-
The Mag Catch Set (15) and Hygrometer (23) are not shown. The Hygrometer is packed alongside the rest of the hardware and is inside a small box of its own.
-
The screws within the package containing the Box Feet (22) are not used.
-
-
-
The Acrylic Lid (12) is not shown in previous pictures, partly because it is clear, and partly because it is easy to distinguish from the rest of the parts.
-
Normally the Acrylic Lid will arrive with protective film on both front and back to prevent scratching during transport. You may remove that film now, or wait until just before you add that part to the box.
-
As with other panel parts, you may need to break away trim from the edges of the Acrylic Lid. The circle where the Hygrometer goes through is meant to be a hole, so if acrylic remains there, remove it and discard it.
-